Uncategorized
Four tips for lighting your fireplace

Feb
As you relax in front of your fireplace or bask in the warmth of your fireplace, the last thing you are likely to be thinking about is the condition of your chimney. However, if you don’t give some thought to it before you light those winter fires, your enjoyment may be very short-lived. Here is some good advice in terms of safety while taking care of the environment.
1. Get your chimney inspected by a professional
Chimney fires are among the most frequent hazards when using your fireplace. Therefore, it is very important that you make sure to get your chimney inspected and cleaned annually to minimize the risk of chimney fires.
Fireplaces and wood stoves are designed to safely contain wood-fuel fires, while providing heat for your home. The chimneys that serve them have the job of expelling the by-products of combustion – the substances produced when wood burns. These include smoke, water vapor, gases, unburned wood particles, hydrocarbon, tar fog and assorted minerals. As these substances exit the fireplace or wood stove, and flow up into the relatively cooler chimney, condensation occurs. The resulting residue that sticks to the inner walls of the chimney is called creosote.
Creosote is a black or brown residue that can be crusty and flaky, tar-like, drippy and sticky or shiny and hardened. All forms are highly combustible. If it builds up in sufficient quantities – and the internal flue temperature is high enough – the result could be a chimney fire.
2. Safety distance
Make sure furniture etc. are moved away or in a safe distance from the fireplace to prevent accidental fires.
3. Air, firewood, kindlers & briquettes
The air supply is essential when lighting your fireplace – combined with dry firewood it provides a cleaner burn of the released gasses.
It is also of great importance to place dry firewood at the bottom of the fireplace, as wet firewood will accumulate the unwanted creosote. Ideally the firewood diameter should be the size of a clenched fist.
The next step is to add kindlers on top of the firewood. Be aware of the air supply and place the kindlers with at least 1cm between each stick.
Lastly, add briquettes on top of the lighting-sticks. Old newspapers can also be used but they are less environmentally friendly.
These steps are categorized as the top-down process, as the fire is set from above. This technique accumulates less creosote and provides a better air supply.
4. Light the fireplace
It can be challenging to light a fireplace, which is why we recommend the use of a table lighter with a long neck and jet-flame technique.
Matches or pocket lighters are not always the best tools to light your fireplace, especially when the briquettes drop in between the kindlers and firewood, making the access very narrow – this is why we recommend using a table lighter with a long neck, to make the job easier and prevent unwanted burns.
Table lighters with jet-flame technique makes the flame strong and straight-pointed. This makes it easier to light the briquettes. Currently, most lighters are equipped with the ‘soft-flame’ technique. The soft-flame technique will make the flame turn upwards as you point the lighter down to light the briquettes, making the process much harder. A straight-pointed flame will solve this issue as well as help you light fires outside as the jet-flame is windproof.
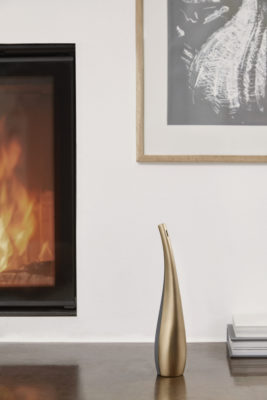
We recommend ‘Sculpture’ the table lighter from mignis. Sculpture combines the long neck and jet-flame technique with decorative design.